Do you remember the Queen song “Under Pressure”?
We don’t want you to feel that way when creating print files. Instead, we want the process to be smooth, your experience enjoyable, and your finished product stunning. Maybe you’re sitting at your computer, preparing to send files to a print shop, or you’re just curious about how print files work. Either way, you’re in the right place! In this article, we’ll guide you through
- what makes a print file usable,
- why well-prepared print files are so important,
- and the role of quality control in ensuring great results.

What are print files? The foundation for the entire production process
Which parameters matter? A guide to the 5 most important requirements
- Scale: Use 1:1 or 1:10 for best results
- Image resolution - ensure sufficient dpi
dpi - what it means for printing
The difference between vector graphics and image files - File size - bigger isn't always better
- Color format - choose CMYK over RGB
- Bleed area - always include a bleed in your print file
Checking print files during quality control – to ensure smooth processes and avoid extra work
Need help creating print files - we've got you covered
![[Translate to English:] Grafikarbeitsplatz mit Computermaus und Tastatur](/fileadmin/procedes/themen/drucktechnik/Druckdatei/druckdatei_7siegel.jpg)
![[Translate to English:] Ansicht einer Grafiksoftware mit geöffnetem Bildmotiv](/fileadmin/_processed_/3/0/csm_druckdatei_wellenbrecher_final_ec2c2ab858.jpg)
The print file defines how your idea will be brought to life through specific parameters. It is aligned with the subsequent production processes:
Do you have a clear idea for a design in mind? Whether you need a large-scale banner for trade shows and events where you can clearly be recognized by your corporate design through colors and your company logo, or if you're looking to design a space with a ceiling sail or improve room acoustics, or if you're pursuing other exciting projects. What all these endeavors have in common is the foundation created by the print file.
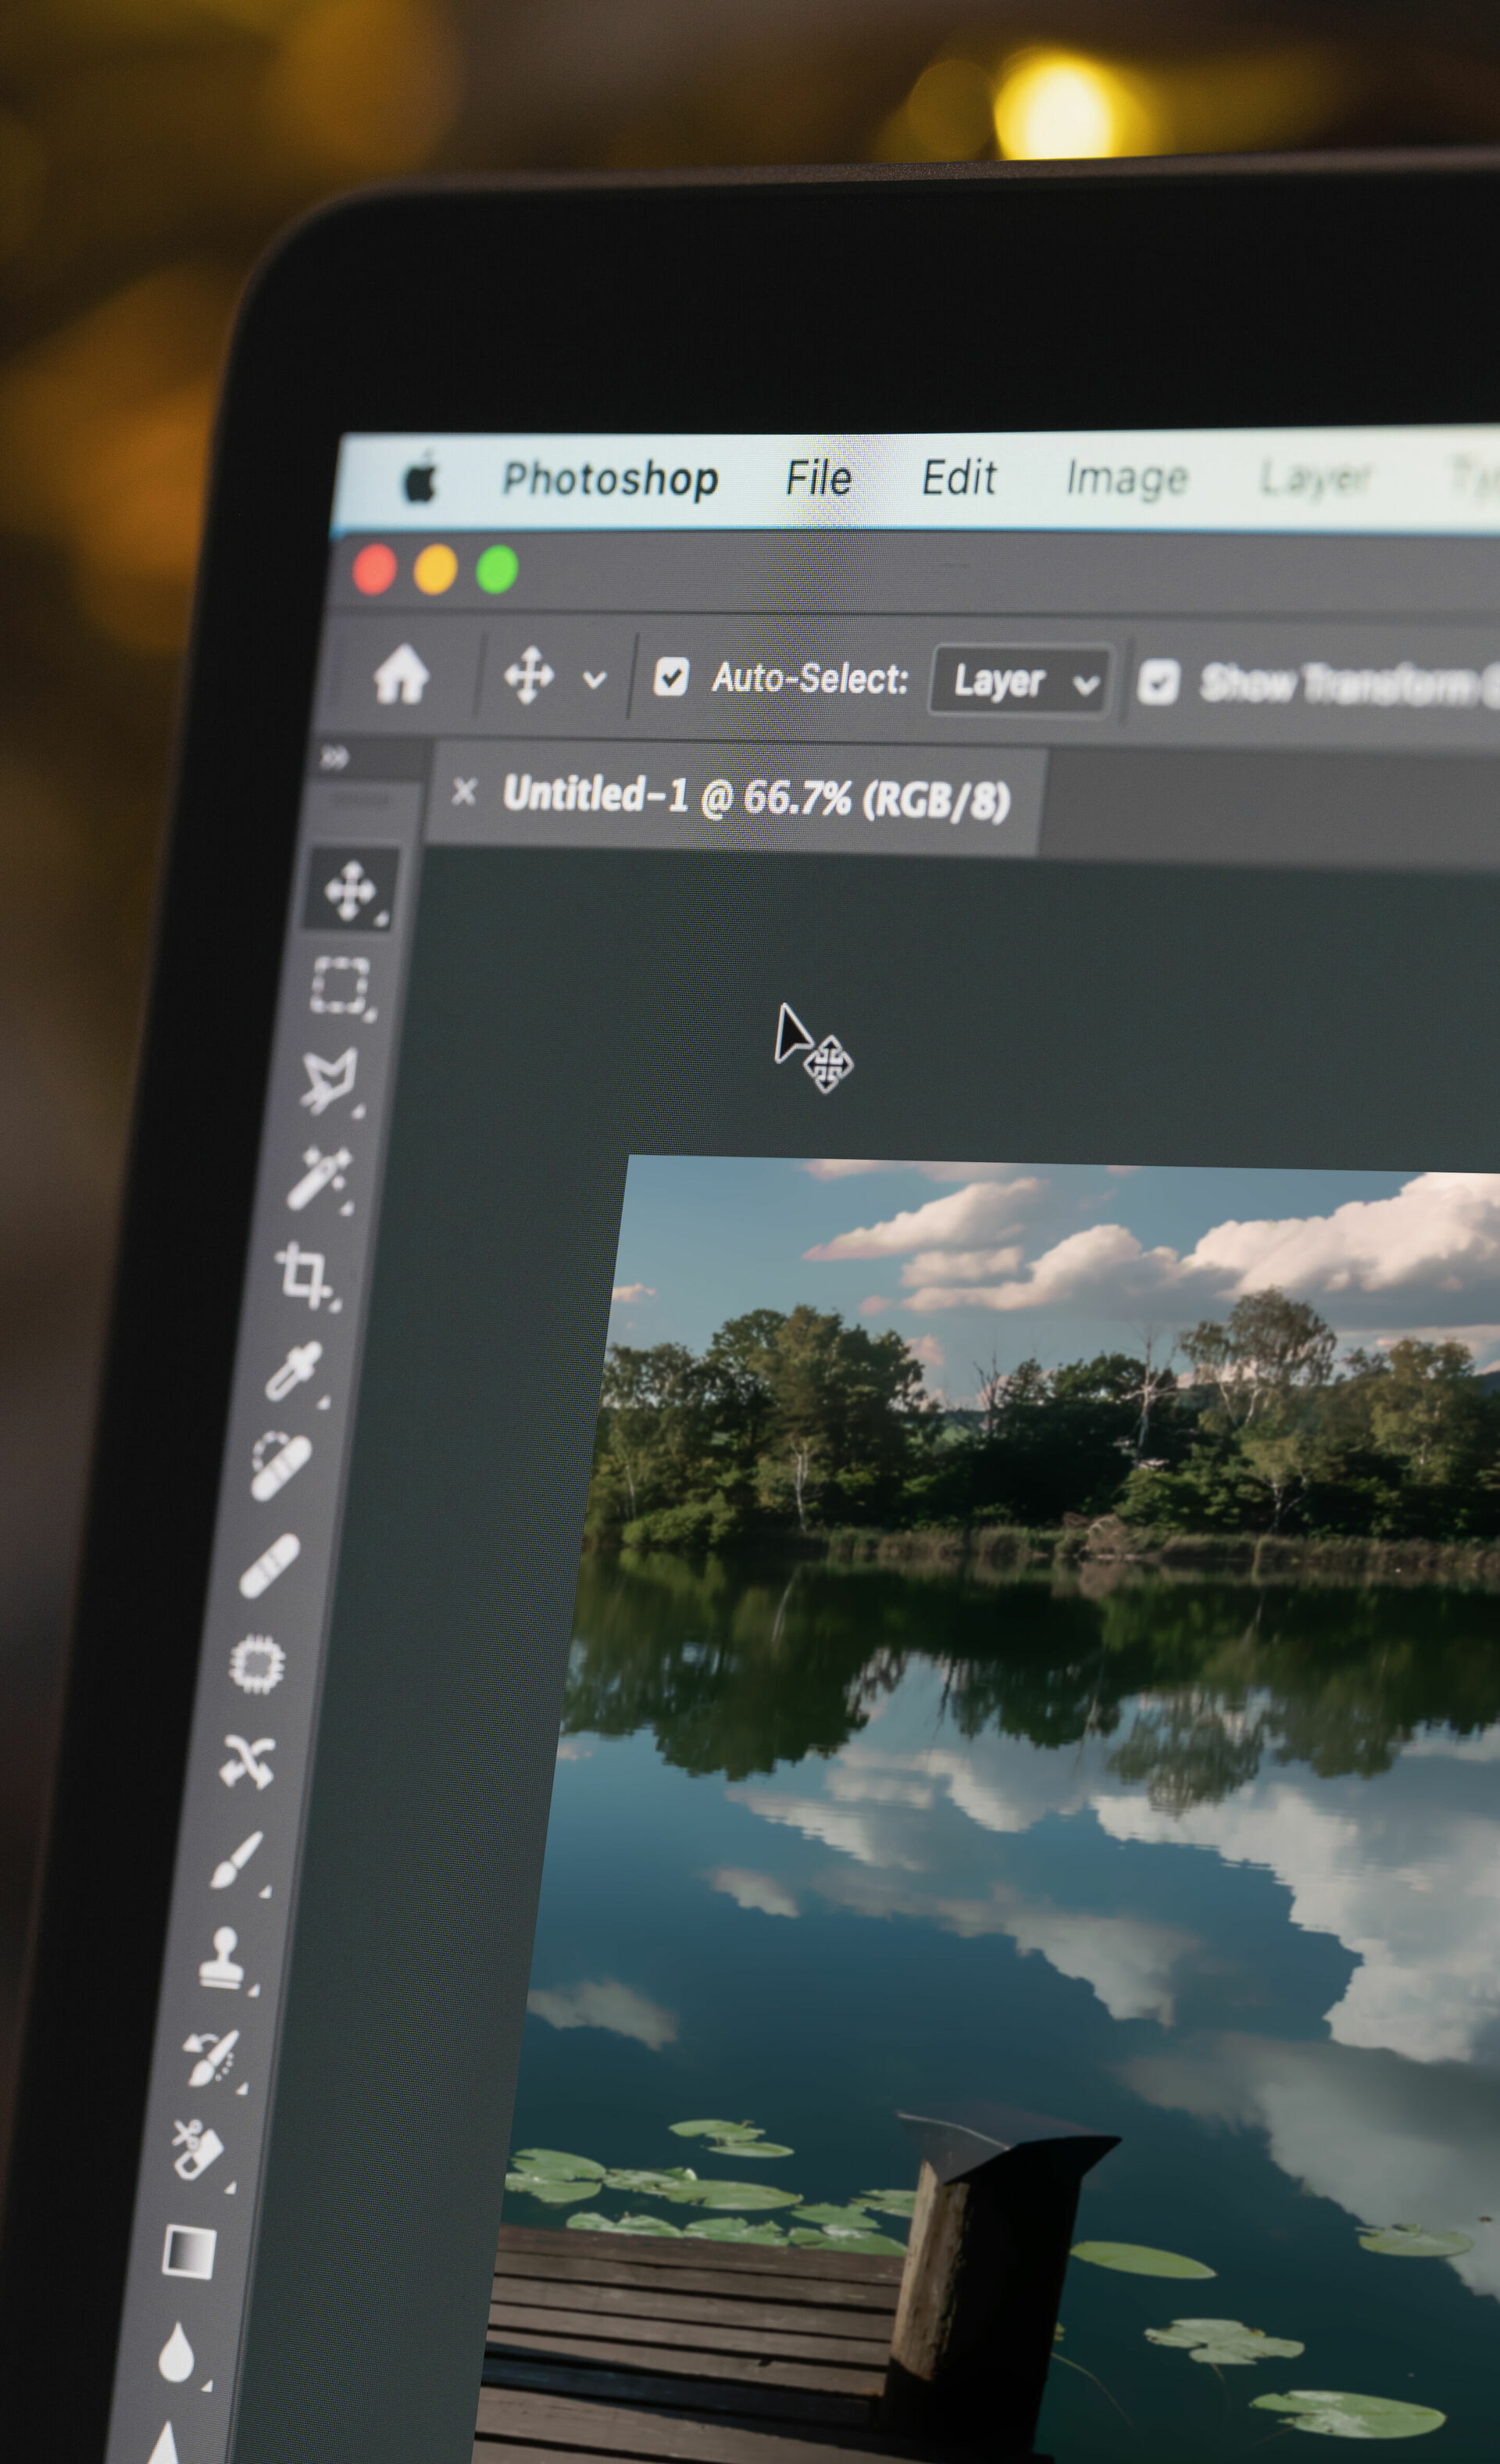
How-to Print File
Before production:
- Order Processing
- Customers create a print file for their order. The following aspects are especially important:
• File format
• Image resolution
• Color mode
• Scale - The project is sent to the graphics department for quality control regarding the print file.
During production:
-
Printing
-
Ready-made
-
Shipping
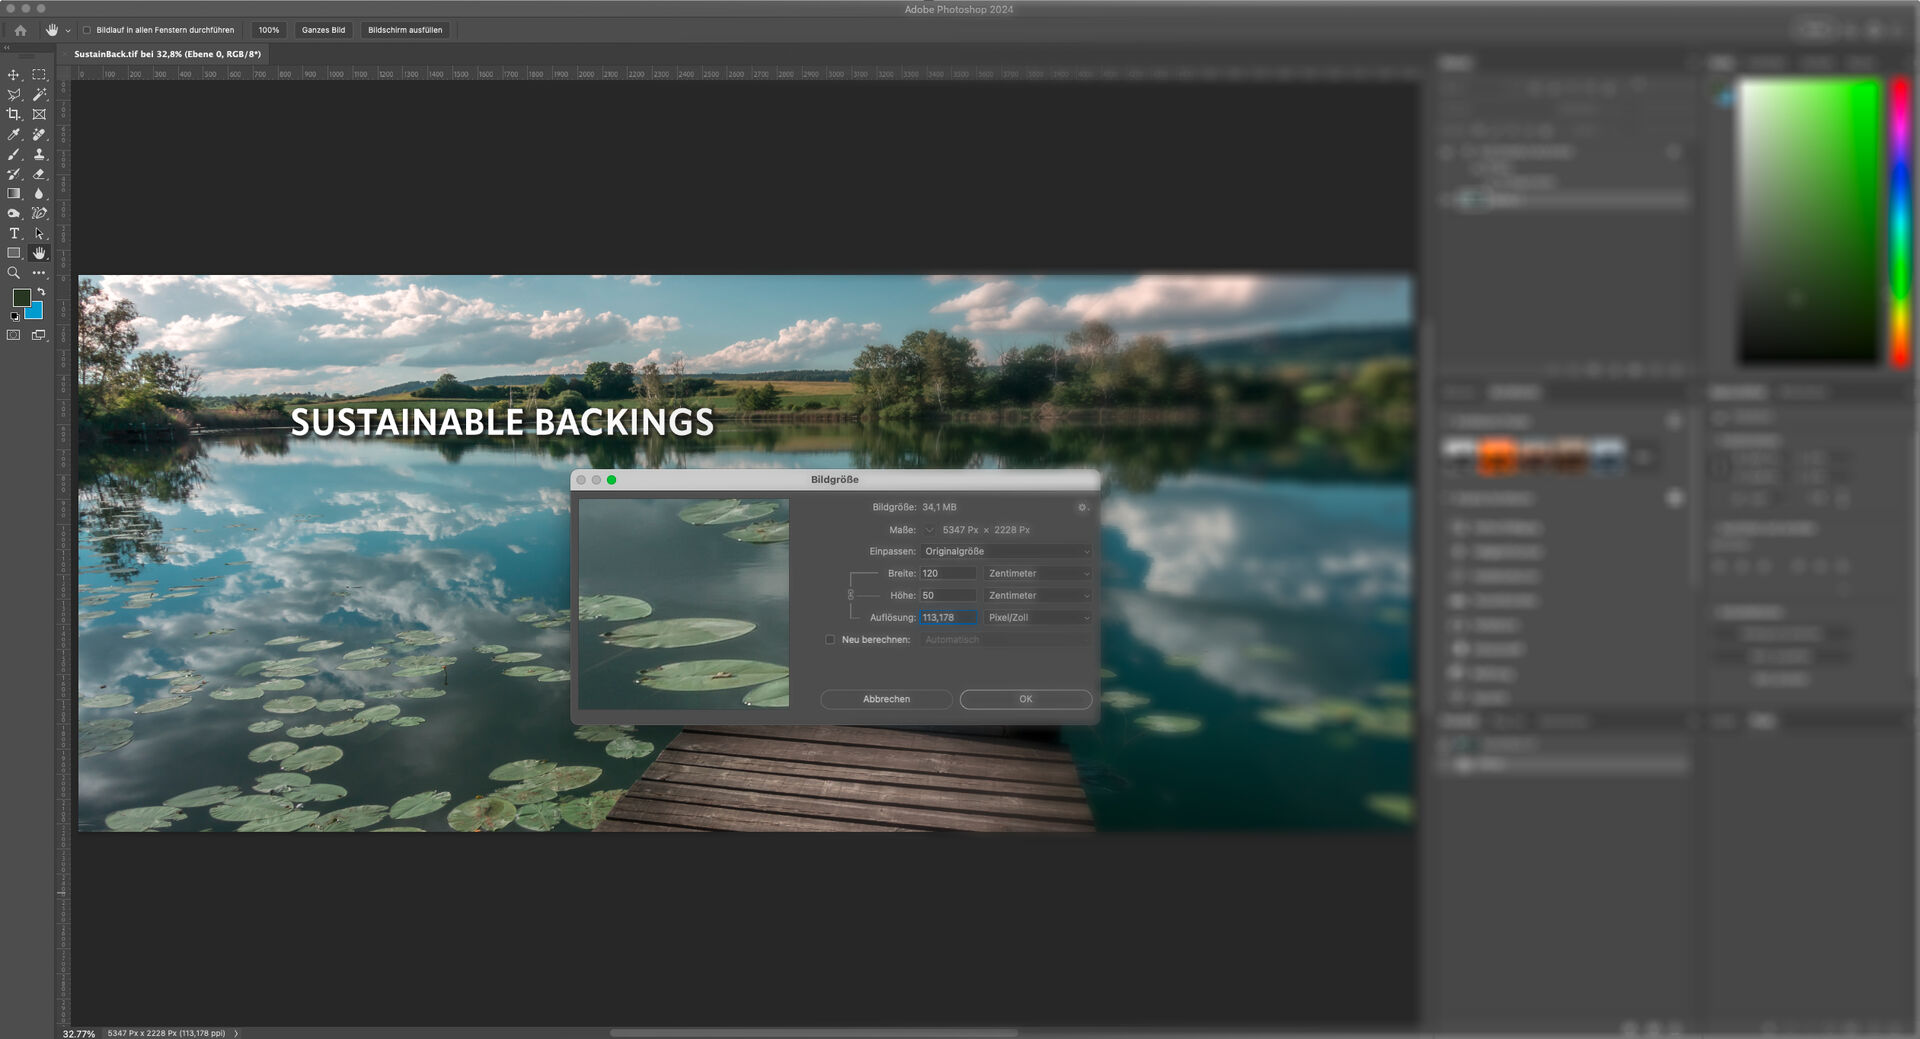
Let’s get one thing straight from the beginning: No matter which software you use to create it, a print file needs to meet a few key criteria. What matters most to us is that:
- the file is set up at the final format
- it uses the CMYK color profile
- It should also have a minimum resolution of 50 dpi at a scale of 1:1, or 500 dpi at a scale of 1:10.
Sounds complicated? It’s actually pretty simple — let’s take a closer look.
The scale defines the ratio between the file size and the actual printed size.
- A 1:10 scale means the design is one-tenth the actual size.
- A 1:1 scale means the design matches the real size.
Tip: Stick to scales like 1:1 or 1:10. Odd scales (e.g., 1:3) can lead to rounding errors that may disrupt workflows or delay printing.
All images and graphics in the file should have a sufficiently high resolution. This is essential for the image quality and sharpness of the print, as both depend on the dpi value.
Note: If a photo is taken in high resolution but is out of focus, the dpi alone won’t be enough to produce a sharp print.
dpi – what it means for printing
During the printing process, the image is broken down into tiny dots — this is called rasterization. The dpi value (dots per inch) is the unit of measurement used to indicate print resolution.
It refers to the number of ink droplets or dots a printer places on the material within one inch. A higher dpi means more dots per inch are printed, resulting in finer detail.

For printing high-resolution photos or detailed graphics, a higher dpi is recommended. It ensures crisp and detailed reproduction. For large prints that are viewed from a greater distance — where fine details are less noticeable — a lower dpi may be sufficient.
Tip: Use vector graphics or image files with appropriately high resolution for text and logos.
A vector graphic is made up of coordinate points connected by paths. It’s not limited to a specific resolution (dpi), which means it can be scaled to any size without losing quality.
Image files, on the other hand, are made up of pixels (resolution). The larger the image is scaled, the larger the pixels become — and the larger the pixels, the more likely the image will appear blurry.
Important: Image resolution and scale are directly related. Keep in mind: A print file created at a 1:10 scale with 300 dpi (the standard for offset printing) may seem sufficient, but it actually results in only 30 dpi when printed at full size. That’s because 300 dpi at a 1:1 scale is divided by 10 — and that’s not enough for good print quality.
As you saw in the previous section, image resolution and scale are closely connected. This also affects the file size of the print file:
That’s why a 500 MB print file might have only 10 dpi, while a much smaller 10 MB file could actually have a higher resolution — with more dpi in relation to the scale.
Tip: Based on years of experience, we recommend a resolution of at least 50 dpi at a 1:1 scale for all images and graphics in the file.
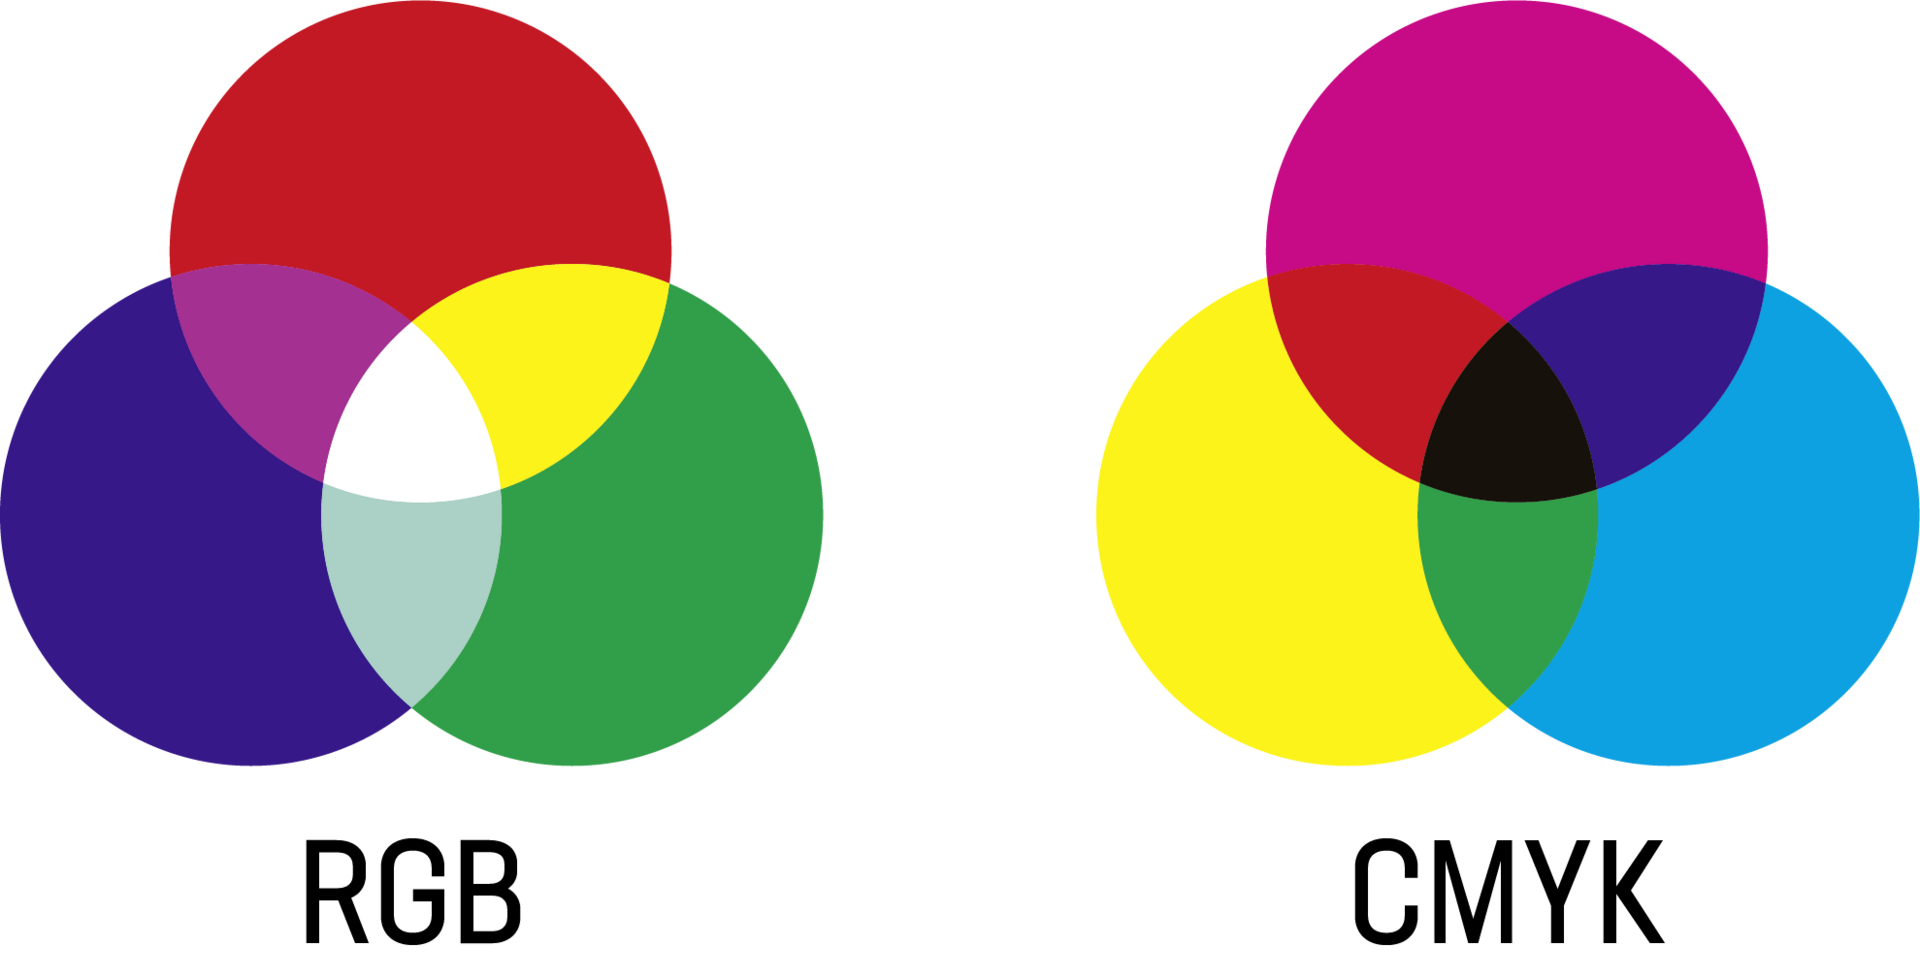
Proper color management determines whether your print turns out the way you envisioned it.
An image in the RGB color space may look vibrant and impressive on a monitor — that's because RGB can display a much wider range of colors than CMYK.
However, RGB is primarily intended for screen display, while large-format digital printing operates exclusively in the CMYK color space.
This means: If your file is in RGB, it will be automatically converted to CMYK. As a result, the colors in your design — including any special tones — may shift and end up looking different from what you saw on your screen.
That’s why it’s best to choose the CMYK color space from the beginning when creating your print file.
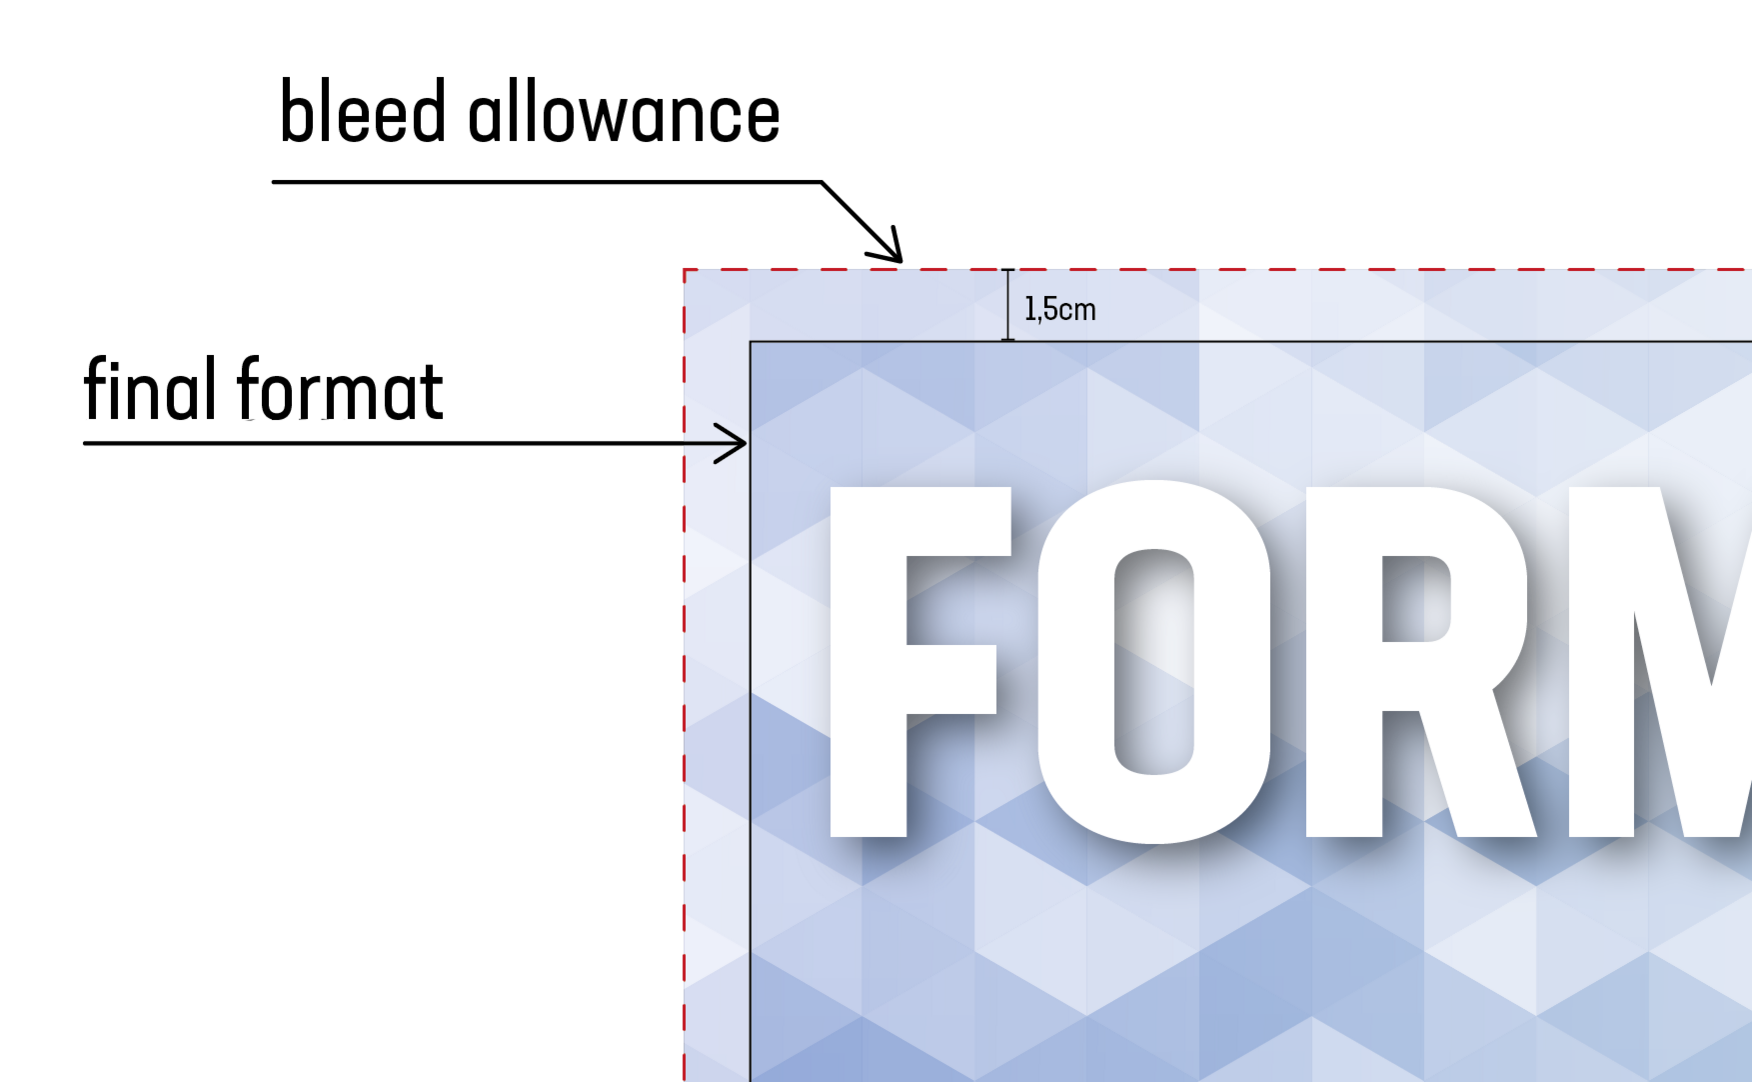
Maybe you’ve had a photo book printed and noticed white edges around the images. Or perhaps you’ve seen business cards where the design doesn’t quite reach the edge. To ensure that a design is printed completely edge to edge — without any unwanted white borders or gaps — you need to include a bleed area. This extends beyond the actual size of the design, which is why it used to be called an “overfill” or “overbleed.” The bleed acts as a safety margin.
Materials can behave differently under tension: depending on the printing method — such as UV or dye-sublimation printing — they may stretch slightly during the print process. The bleed helps compensate for that movement.
The bleed should be 1.5 cm at a 1:1 scale or 15 mm at a 1:10 scale.
Example: If your final design is 300 x 300 cm, the file should be set up at 303 x 303 cm to include the bleed.
We always recommend adding 1.5 cm of color or design elements beyond the trim area. That way, we can be absolutely sure your print will come out clean — right to the edge.

Large online print shops often don’t check files for errors — but we do things differently. We place great value on strict quality control.
There’s a big difference between someone glancing briefly at a flyer in their hand and someone standing in front of a 3-by-3-meter trade show wall with your company logo — your brand’s statement piece — printed in purple instead of red.
That’s why we always review print files, even if they appear to be perfectly prepared. This is done either automatically through our system or manually by our graphics team. It’s especially important to:
-
Deliver your order exactly as you envisioned it
-
Accurately represent your corporate design
-
Produce in a resource-efficient way
-
Avoid unnecessary time and cost — and ensure on-time delivery, which is especially crucial for events and trade shows
-
Guarantee smooth workflows in production
Note: We generally can’t begin processing your project until we have received the print files.
From our many years of experience, we know that creating a print file can be a bit tricky. What we truly appreciate is when you reach out to us and say, "I'd like to have something produced with you - how do I create a print file?"
In addition to this article, we’re happy to support you with our data sheet or offer personal assistance — because we know:
The path to the perfect print file is as varied as the
software available on the market today.
And each software has its own quirks —
and sometimes even some pitfalls.
We hope you’ll feel a little less “under pressure” when it comes to print files from now on.
That this guide helps you create print-ready files — and takes some of the stress off your shoulders.
Since we work with many exciting clients and unique projects, the standard guidelines aren’t always enough.
Feel free to reach out to us with special cases or custom constructions — we’ll always find a way to ensure smooth workflows on all sides.
![[Translate to English:] Round textile sculptures in white hang from the ceiling.](/fileadmin/_processed_/f/7/csm_cta-procedes_b2c2ad64de.jpg)